

Introduction
Android development can be a daunting topic on its own merit but throw in Bluetooth Low Energy, and you might be tempted to switch to iOS.
But in all seriousness, Bluetooth Low Energy development on Android can be painful and extremely error-prone without the right guidance. With the right guidance, it is possible to build robust Bluetooth Low Energy applications on Android and enjoy it!
Android provides a plethora of options for performing Bluetooth Low Energy scans. Properly configuring and understanding the available options is the only way to leverage them effectively.
In addition to an overwhelming number of Bluetooth Low Energy scan options, Android also requires user permissions that vary among API versions making permission management an additional chore. Again, with the right guidance, it’s possible to deal with these Android eccentricities and enjoy working with Bluetooth Low Energy.
In this article, we will cover all of the steps required to set up an Android application to begin scanning for Bluetooth Low Energy devices. We will not be covering any User Interface specific implementation in this tutorial to focus on the most important aspects of Bluetooth Low Energy development on Android.
In this tutorial, we will cover the following topics:
- Project setup and overview of Android Studio debugging and logging
- Configuring and requesting required user permissions
- Introduction to SharedFlows and StateFlows from the Coroutines Framework
- Bluetooth radio state monitoring
- Bluetooth Low Energy scan configuration
- Android Scanning Limitations
- Callback-based Bluetooth Low Energy Scanning
- PendingIntent-based Bluetooth Low Energy scanning
- Summary: Callback vs. PendingIntent based scanning
- Logging Scan Results
- Summary and Next Steps
Prerequisites
- Mac running macOS 11 or later or Windows computer running Windows 10 or later
- Android Studio Bumblebee [Download here]
- An Android mobile device running Android 10 or later
- Familiarity with Kotlin is helpful but not required
- Familiarity with Asynchronous programming
- Basic understanding of Android development
For the steps laid out in this article, we'll be using the following:
- MacBook Pro 2021 with macOS Monterey
- Android Studio Bumblebee 2021.1.1 Patch 2
- Google Pixel 3A with Android 11
Android Studio Project Setup
Open Android Studio and select -> New Project. Select “Empty Activity” for the project type then click “Next.”
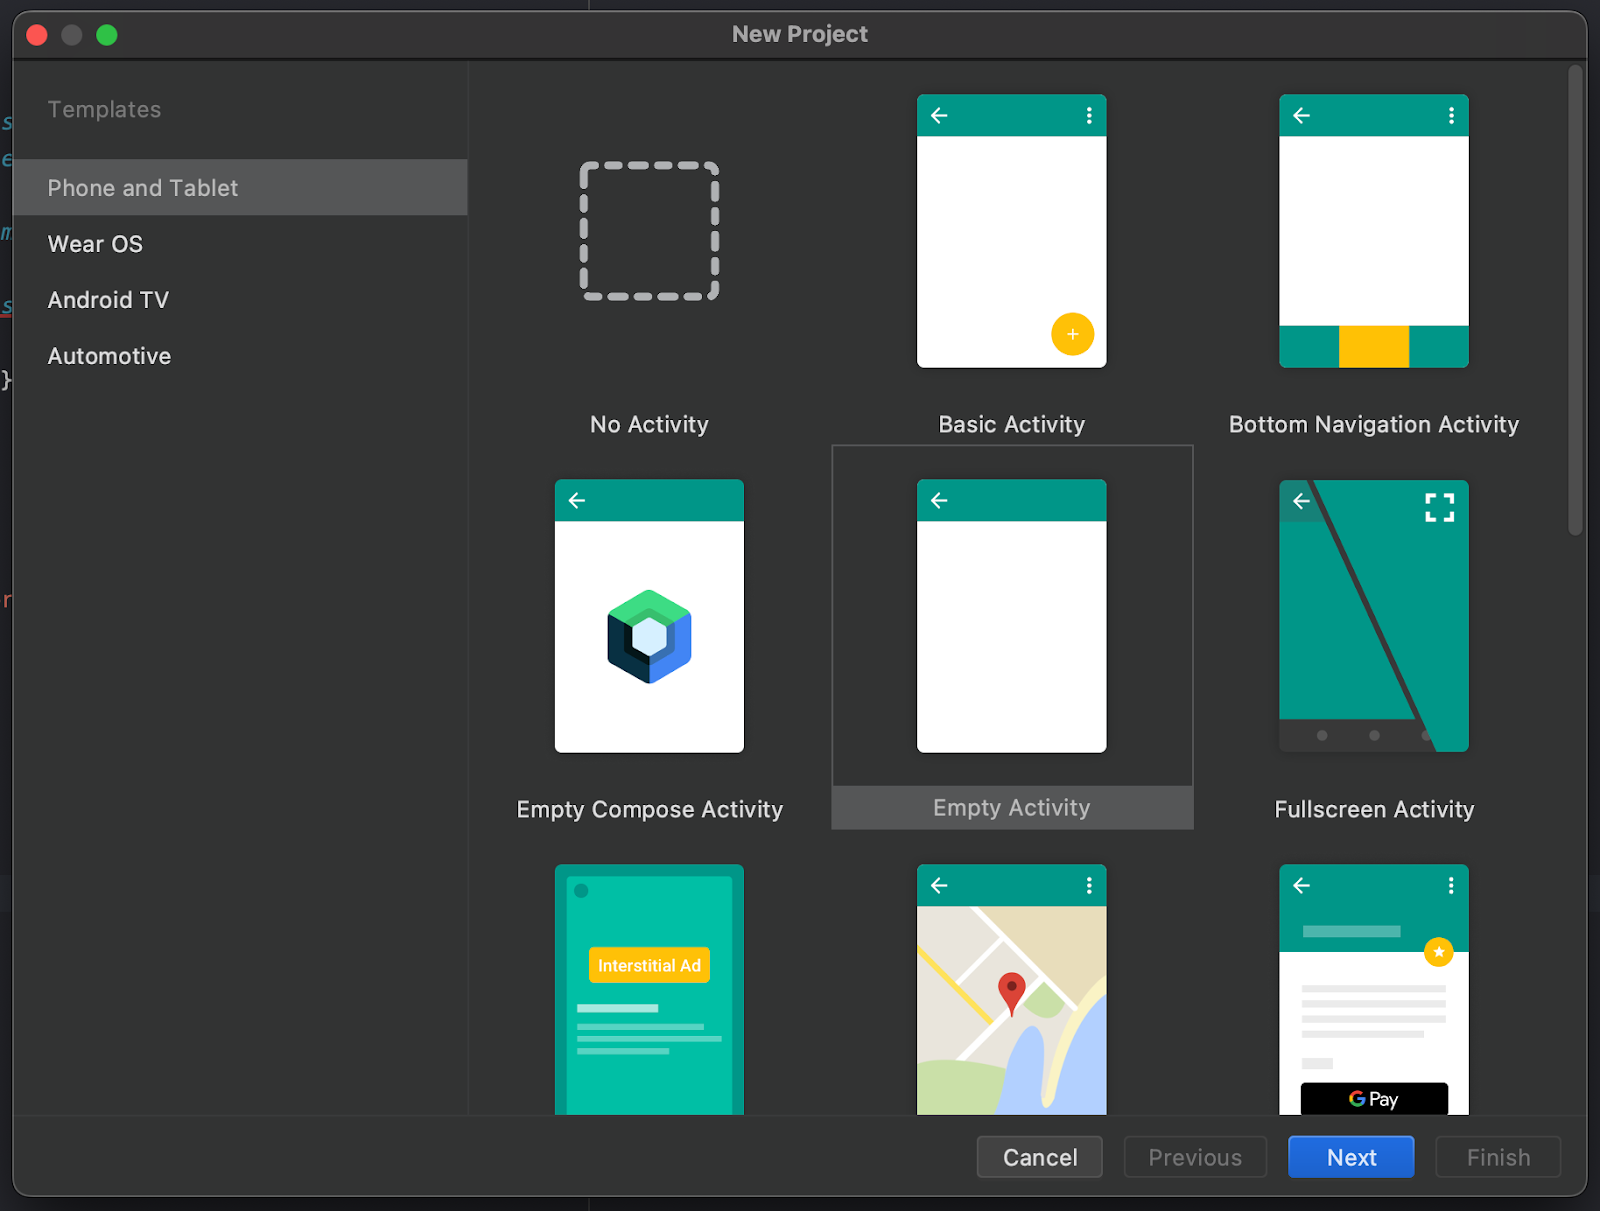
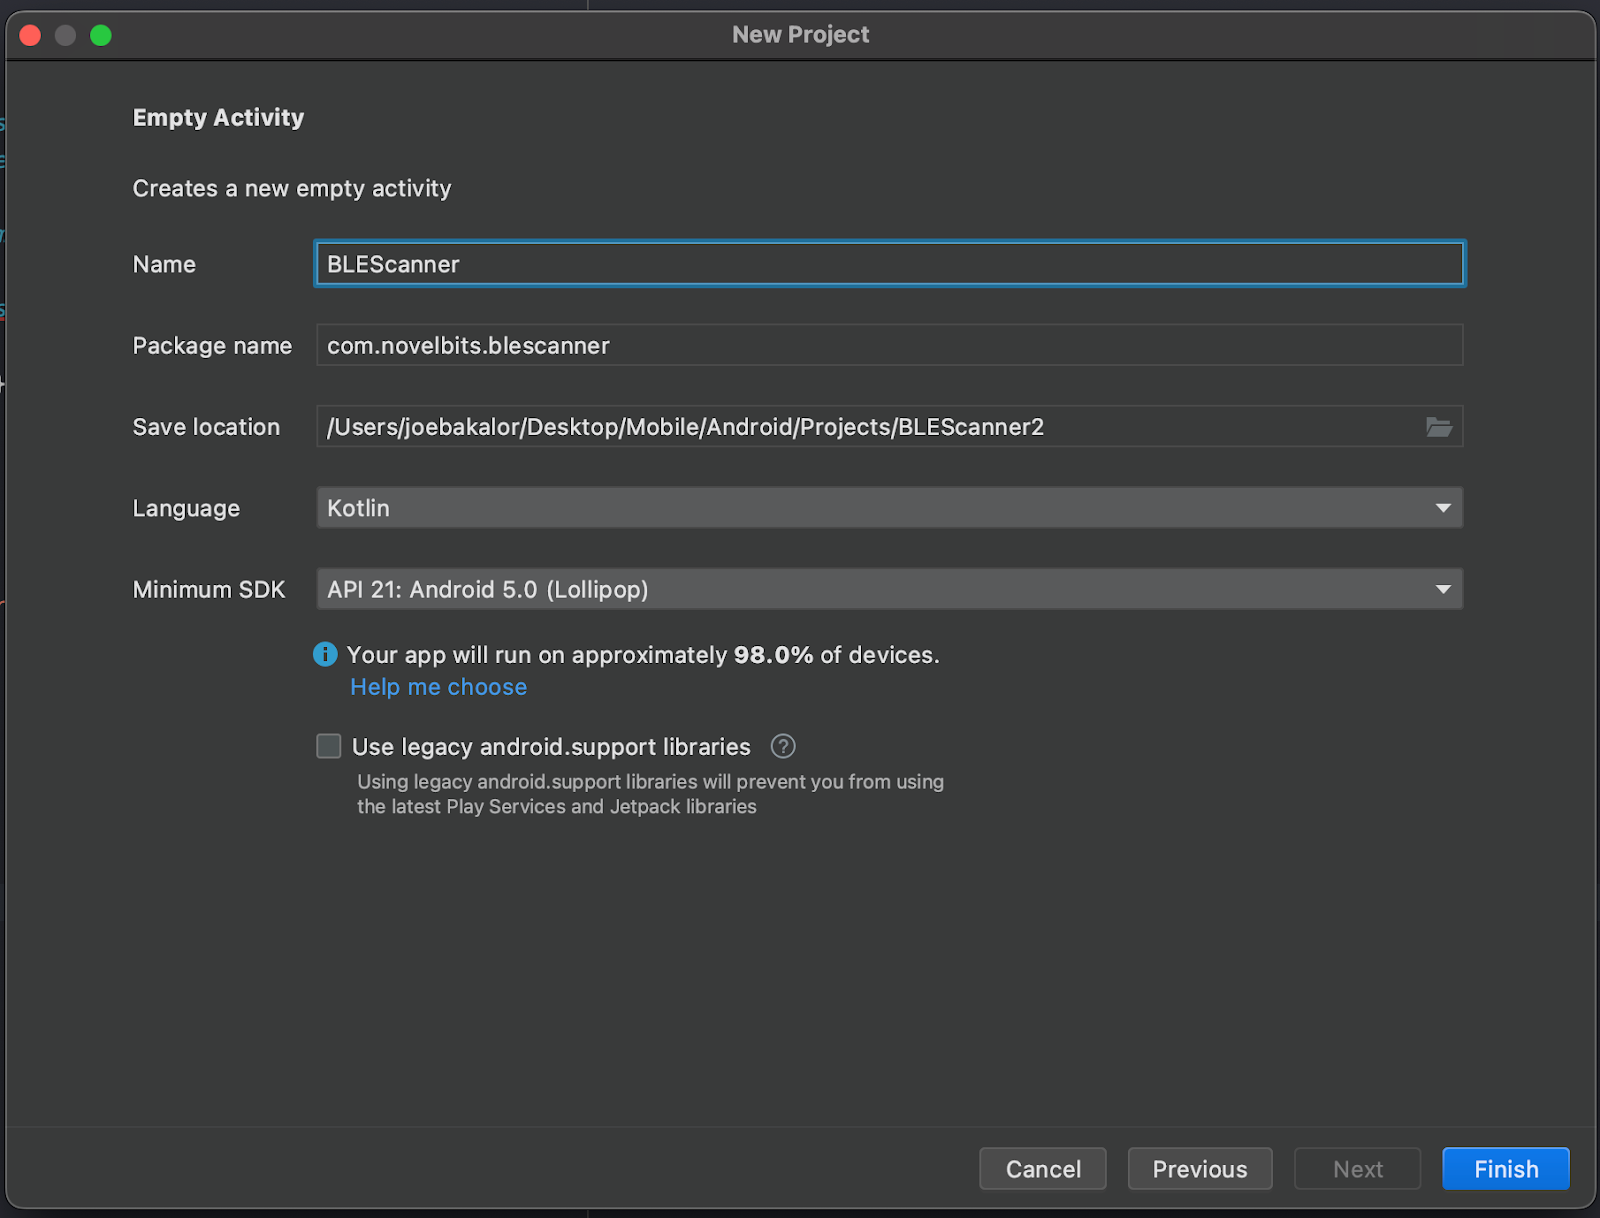
Update the project details to match the following image. Make sure the “Name” and “Package name” match exactly as shown; later portions of the project will depend on the naming used here.
Android Studio Overview
A full introduction to Android Studio is outside the scope of this tutorial. We will review the key functionalities that will be used in the context of this tutorial.
Device selection
After you have plugged your development device into the computer you will be using for this tutorial; you should be able to select it from the drop-down menu in the top right portion of the toolbar. It may take a couple of minutes for Android Studio to finish setting up the new project, so you may not be able to access all of the options in the toolbar until that finishes (progress shown in the taskbar at the bottom of the screen in Android Studio).

If you do not see your device under the drop-down menu, ensure you have enabled developer mode and USB debugging.
Run vs. Debug
There are two options for loading the application onto your mobile device, Run and Debug. The Run option is represented by the Play button in the toolbar. The debug option is represented by the Bug button in the toolbar. Breakpoints will not work if the Run option is used; you must use the Debug option.
Logging
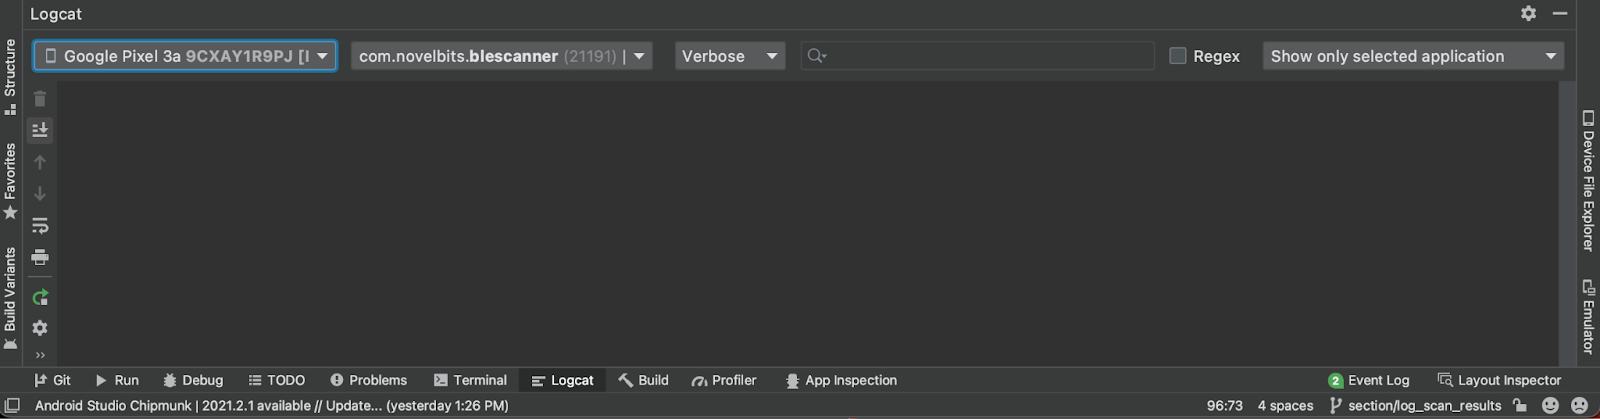
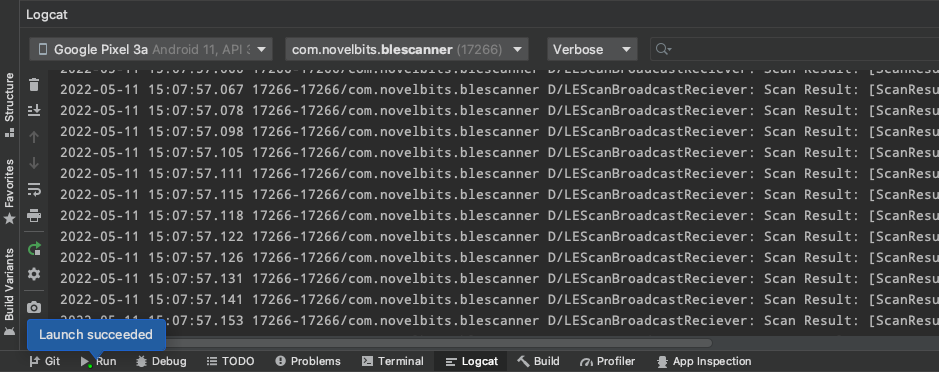
Console logs will be printed in the Logcat tab in the bottom toolbar in Android Studio. Make sure to select your connected device from the first dropdown on the left, the application from the second drop-down, and “Show only selected application” from the dropdown on the far right. If you do not select “Show only selected application,” you will see logs for all Android processes making it difficult to find what you are logging from the application.
API Support Level
In production apps, it’s good practice to support a minimum of the three most recent major OS release versions. Android’s latest production release is Android 12 so we are going to configure our project to support a minimum of Android 9. We configure this by setting the minimum SDK version defined in BLEScanner/app/build.gradle. Each Android OS version has a corresponding SDK version.
This can be a little confusing, but it’s very easy to figure out the SDK version for a specific Android version with a quick google search. In the case of Android 9, the corresponding SDK version is 26. Update the build.gradle file located at BLEScanner/app/build.gradle to match the following:
plugins {
   id 'com.android.application'
   id 'org.jetbrains.kotlin.android'
}
android {
   compileSdk 32

   defaultConfig {
       applicationId "com.novelbits.blescannertest"
       minSdk 26
       targetSdk 32
       versionCode 1
       versionName "1.0"

       testInstrumentationRunner "androidx.test.runner.AndroidJUnitRunner"
   }

   buildTypes {
       release {
           minifyEnabled false
           proguardFiles getDefaultProguardFile('proguard-android-optimize.txt'), 'proguard-rules.pro'
       }
   }
   compileOptions {
       sourceCompatibility JavaVersion.VERSION_1_8
       targetCompatibility JavaVersion.VERSION_1_8
   }
   kotlinOptions {
       jvmTarget = '1.8'
   }
}

dependencies {
   implementation 'androidx.core:core-ktx:1.7.0'
   implementation 'androidx.appcompat:appcompat:1.4.1'
   implementation 'com.google.android.material:material:1.6.0'
   implementation 'androidx.constraintlayout:constraintlayout:2.1.4'
   testImplementation 'junit:junit:4.13.2'
   androidTestImplementation 'androidx.test.ext:junit:1.1.3'
   androidTestImplementation 'androidx.test.espresso:espresso-core:3.4.0'
}
Required Permissions
Explanation of required permissions
Android requires a combination of user permissions to perform a Bluetooth scan, and several permissions depend on the Android SDK version.
- BLUETOOTH: is necessary to perform any Bluetooth classic or BLE communication, such as requesting a connection, accepting a connection, and transferring data.
- BLUETOOTH_ADMIN: If you want your app to initiate device discovery or manipulate Bluetooth settings
The Bluetooth and Bluetooth Admin permissions were required up to Android 12, SDK Version 30. We need to make sure to request these permissions only when the device running the application is Android 12 or earlier.
- BLUETOOTH_SCAN: If your app looks for Bluetooth devices, such as BLE peripherals.
- ACCESS_FINE_LOCATION: this is necessary because, on Android 11 and lower, a Bluetooth scan could potentially be used to gather information about the user's location.
For Android 11 and greater, this is only needed if your application relies on Bluetooth scan results to derive location. If not, then add the “usesPermissionFlags” to the SCAN permission in your manifest, as shown below:
<uses-permission android:name="android.permission.BLUETOOTH_SCAN" android:usesPermissionFlags="neverForLocation"/>NOTE: Including this will result in some BLE beacons, such as iBeacons, being filtered from scan results. Additionally, this is only available in Android 12 (SDK 31) and later.
- ACCESS_COARSE_LOCATION: If your app targets Android 9 (API level 28) or lower, you can declare this instead of ACCESS_FINE_LOCATION
Configuring Permissions
In Android, any permissions that will be requested from the user need to be included in the Android manifest. Open the AndroidManifest.xml file and add the permissions shown below. Note how BLUETOOTH, BLUETOOTH_ADMIN, and ACCESS_COARSE_LOCATION all include a max SDK version.
<?xml version="1.0" encoding="utf-8"?>
<manifest xmlns:android="http://schemas.android.com/apk/res/android"
    package="com.novelbits.blescanner">

    <!-- Request legacy Bluetooth permissions on older devices. -->
    <uses-permission android:name="android.permission.BLUETOOTH"
        android:maxSdkVersion="30" />
    <uses-permission android:name="android.permission.BLUETOOTH_ADMIN"
        android:maxSdkVersion="30" />
    <uses-permission android:name="android.permission.ACCESS_COARSE_LOCATION"
        android:maxSdkVersion="28"/>

    <uses-permission android:name="android.permission.BLUETOOTH_SCAN"/>
    <uses-permission android:name="android.permission.ACCESS_FINE_LOCATION"/>

    <application
        android:allowBackup="true"
        android:icon="@mipmap/ic_launcher"
        android:label="@string/app_name"
        android:roundIcon="@mipmap/ic_launcher_round"
        android:supportsRtl="true"
        android:theme="@style/Theme.BLEScanner">
        <activity
            android:name=".MainActivity"
            android:exported="true">
            <intent-filter>
                <action android:name="android.intent.action.MAIN" />

                <category android:name="android.intent.category.LAUNCHER" />
            </intent-filter>
        </activity>
    </application>

</manifest>
Requesting User Permissions
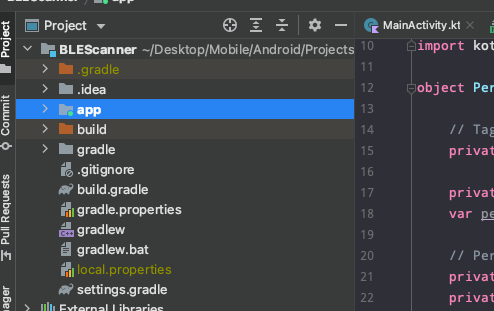
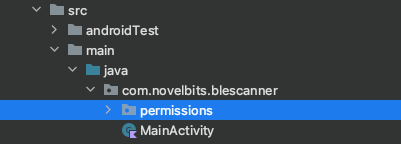
Android also requires permissions to be requested from the user during application run-time. Make sure your current view perspective is set to Project.
Add a new folder and name it permissions. Right-click, select “New,” then select “Package.”

Create a new Kotlin Class/File called PermissionManager, and select Object as the type. We will be following the built-in Kotlin singleton pattern. Declare the PermissionManager as an Object.
Add a new constant for TAG at the top of the file that will be used for logging.
object PermissionManager {

    // Tag used in our console logs
    private const val TAG = "PermissionManager"

}
We need to keep track of the required permissions for our applications and the permissions that need to be requested. This will allow us to request only the permissions that have not yet been granted by the user. Declare two new variables at the top, inside the PermissionManager object, permissionsRequired and permissionsToRequest.
Additionally, inside the PermissionManager object, add a public variable named permissionsGranted with public get and private set properties. Add a private _permissionsGranted variable to act as the property backing for the publicly accessible permissionsGranted variable.
// Public access to permissions
var permissionsGranted: Boolean = false
    get() = _permissionsGranted
    private set

// Indicate whether all permissions have been granted
private var _permissionsGranted: Boolean = false

// Permissions required & Permissions we will prompt the user for this lifecycle
private val permissionsRequired: MutableList<String> = buildPermissionsList()
private val permissionsToAsk: MutableList<String> = arrayListOf()
Now define a function inside the PermissionManager object to populate the permissionsRequired list called buildPermissionsList. We need to add the appropriate permissions to ask based on the Android SDK Version.
Android SDK 28 and lower
- BLUETOOTH
- BLUETOOTH_ADMIN
- ACCESS_COARSE_LOCATION
Android SDK 30 and lower
- BLUETOOTH
- BLUETOOTH_ADMIN
- ACESSS_FINE_LOCATION
Android SDK 31 and greater
- BLUETOOTH_SCAN
- ACCESS_FINE_LOCATION
/**
 * Add all permissions your app requires
 * @return MutableList<String> of permissions
 */
private fun buildPermissionsList(): MutableList<String> {
    val permissionsList = mutableListOf<String>()

    if (Build.VERSION.SDK_INT <= 28) {
        permissionsList.add(Manifest.permission.BLUETOOTH)
        permissionsList.add(Manifest.permission.BLUETOOTH_ADMIN)
        permissionsList.add(Manifest.permission.ACCESS_COARSE_LOCATION)
    }
    else if (Build.VERSION.SDK_INT <= 30) {
        permissionsList.add(Manifest.permission.BLUETOOTH)
        permissionsList.add(Manifest.permission.BLUETOOTH_ADMIN)
        permissionsList.add(Manifest.permission.ACCESS_FINE_LOCATION)
    }
    else if (Build.VERSION.SDK_INT >= 31) {
        permissionsList.add(Manifest.permission.BLUETOOTH_SCAN)
        permissionsList.add(Manifest.permission.ACCESS_FINE_LOCATION)
    }

    return permissionsList
}
Add another function, called askPermissions that takes an Android Activity as an argument. The activity reference will be needed when requesting permissions. Inside of the askPermissions function, add code to iterate through the required permissions and check which permissions have not been granted, and add those permissions to our permsissionsToRequest array.
/**
 * Ask user permissions for all required permissions within this object
 * onRequestPermissionResult will be called once all permissions have been granted or dismissed
 * @param activity activity
 */
fun askPermissions(activity: Activity) {

    // Create permissionsToAsk list based off if permission has been granted already
    permissionsRequired.forEach { permission ->
        if (ContextCompat.checkSelfPermission(
                activity.applicationContext,
                permission
            ) != PackageManager.PERMISSION_GRANTED
        ) {
            // Add to permissionsToAsk list
            permissionsToAsk.add(permission)
        }
    }
}
Make sure to import Manifest and Build at the top of PermissionManager as shown:
import android.Manifest
import android.os.Build
Add a new constant at the top inside of PermissionManager called requestCode and set it to 1. This value will be provided when we request the permissions so that we can match the value returned in the callback we are going to add.
// Request Code to be used with permissions request
val requestCode = 1
Next, we need to request the permissions included in the permissionsToRequest array we just populated (shown under the // Request each permission comment below).
/**
 * Ask user permissions for all required permissions within this object
 * onRequestPermissionResult will be called once all permissions have been granted or dismissed
 * @param activity activity
 */
fun askPermissions(activity: Activity) {

    // Create permissionsToAsk list based off if permission has been granted already
    permissionsRequired.forEach { permission ->
        if (ContextCompat.checkSelfPermission(
                activity.applicationContext,
                permission
            ) != PackageManager.PERMISSION_GRANTED
        ) {
            // Add to permissionsToAsk list
            permissionsToAsk.add(permission)
        }
    }

    // Request each permission
    if (permissionsToAsk.size > 0) {
        ActivityCompat.requestPermissions(
            activity,
            permissionsToAsk.toTypedArray(),
            requestCode
        )
    }

     else {
      permissionsGranted = true
    }

}
Make sure to add the following imports at the top of PermissionManager.
import android.app.Activity
import android.content.pm.PackageManager
import androidx.core.content.ContextCompat
import androidx.core.app.ActivityCompat
The permissions must be requested from an Activity so we need to make it possible to route the permissions request result callback to the permissionsManager. Add a new function inside the PermissionManager called onRequestPermissionResult that takes the parameters shown below.
Inside onRequestPermissionResult we first need to verify that the request code matches the value we provided in the request. Next, we need to verify that all the requested permissions were granted by the user. We can do this easily using the any function. The function accepts a predicate that checks if the given condition is true for any of the items in the array.
/**
 * Receives callback ONCE with array of permissions and results
 * Called from overridden OnRequestPermissionResult from Activity
 */
fun onRequestPermissionsResult(
    requestCode: Int,
    permissions: Array<out String>,
    grantResults: IntArray
) {
    // Make sure the request code matches
    if (this.requestCode == requestCode){

       // Check if any of the permissions were not granted
       _permissionsGranted = grantResults.any{ it == PackageManager.PERMISSION_DENIED }
    }
}
Inside the MainActivity, override the onRequestPermissionResult function. Inside the function make a call to onRequestPermissionResult in the PermissionManager object. Now the permissions request result can be handled by the PermissionManager.
override fun onRequestPermissionsResult(
    requestCode: Int,
    permissions: Array<out String>,
    grantResults: IntArray
) {
    super.onRequestPermissionsResult(
        requestCode,
        permissions,
        grantResults)
    PermissionManager.onRequestPermissionsResult(
        requestCode,
        permissions,
        grantResults)
}
We need to invoke request permissions from the MainActivity. First, make sure to import the correct dependency. Add a call to PermissionManager.askPermissions inside of the onCreate function. Now, permissions will be requested when the app starts but only permissions that have not already been granted will be requested.
override fun onCreate(savedInstanceState: Bundle?) {
    super.onCreate(savedInstanceState)
    setContentView(R.layout.activity_main)
    PermissionManager.askPermissions(this)
}
Go ahead and run the app on a device and make sure the appropriate permissions are requested from the user. Requesting user permissions is only required one time. If you want to see which permissions have been granted or denied, you can long-press on the app and then select “App info” and then select “Permissions.”
Flow Concepts
Coroutines
Asynchronous programming is an important part of Android development in general and an especially important part of working with Bluetooth Low Energy. In Kotlin, we use Coroutines for building logic to deal with asynchronous events. A Coroutine is an instance of an asynchronous block of code, i.e. a piece of code that we can invoke and completion can be expected at a later time. An in-depth Coroutines tutorial is outside the scope of this tutorial.
A complete Coroutines introduction along with examples can be found at https://kotlinlang.org/docs/coroutines-guide.html.
CoroutineScope
In many cases, we will have several coroutines in a class that will need to be canceled together. CoroutineScope enables us to attach all our coroutines to a single cancellable scope rather than needing to cancel each coroutine individually. We will typically define a CoroutineScope at the top of Classes that will rely on Coroutines.
Flows
In Coroutines, we can use Flows to emit “flows” of data sequentially through a single entry point. A Flow is analogous to a pipe for data. For example, you could use a flow to provide real-time updates from a database. StateFlows and SharedFlows are included with the Flows API that allows up to emit state and value updates to multiple receivers. We will rely heavily on both StateFlows and SharedFlows in this tutorial.
StateFlows
A StateFlow is an observable state holder. StateFlows hold a state-value and emit state-value changes to observers. StateFlows are useful when we need to provide an observable state on a class. For example, if we had a Flashlight class, it would be useful to provide an observable power state. Other classes would be able to check the current power state if needed and also be able to observe power state changes.
SharedFlows
SharedFlows are similar to StateFlows except that they do not store state so observers would only receive emitted data but would not be able to access a current value. SharedFlows are useful when we need to emit values that are only meaningful at the time they are emitted. For example, if we were taking a measurement from an accelerometer once per second and emitting the measured value, the value would only be valid at the moment the measurement was taken. So there would be no need to make that value available after it was emitted.
Coroutine Dependencies
We need to add the appropriate dependencies in our project for Coroutines. Add the dependencies shown below in the BLEScanner/app/build.gradle file.
dependencies {

    implementation 'androidx.core:core-ktx:1.7.0'
    implementation 'androidx.appcompat:appcompat:1.4.1'
    implementation 'com.google.android.material:material:1.5.0'
    implementation 'androidx.constraintlayout:constraintlayout:2.1.3'
    testImplementation 'junit:junit:4.13.2'
    androidTestImplementation 'androidx.test.ext:junit:1.1.3'
    androidTestImplementation 'androidx.test.espresso:espresso-core:3.4.0'
    implementation "org.jetbrains.kotlinx:kotlinx-coroutines-core:1.6.0"
    implementation "org.jetbrains.kotlinx:kotlinx-coroutines-android:1.6.0"
}
Let’s update our PermissionsManager to leverage StateFlows so that we can provide an asynchronous observable property. Add both MutableStateFlow and StateFlow as dependencies at the top of the file.
import android.Manifest
import android.app.Activity
import android.content.pm.PackageManager
import android.os.Build
import androidx.core.app.ActivityCompat
import androidx.core.content.ContextCompat
import kotlinx.coroutines.flow.MutableStateFlow
import kotlinx.coroutines.flow.StateFlow
This will allow us to perform an action when permissions have been granted without polling for changes in permissions. Replace the following code that we defined towards the top of PermssionManager,
// Public access to permissions
var permissionsGranted: Boolean = false
   get() = _permissionsGranted
   private set

// Indicate whether all permissions have been granted
private var _permissionsGranted: Boolean = false
with the code shown below:
private var _permissionsGranted = MutableStateFlow<Boolean>(false)
var permissionsGranted: StateFlow<Boolean> = _permissionsGranted
The new variable types, MutableStateFlow and StateFlow, may show up as red if the correct imports were not already added. If you hover over each of the variable types that are shown in red, you will be presented with a popup providing you the option to import the correct dependencies. Mouseover and select import for both MutableStateFlow and StateFlow.
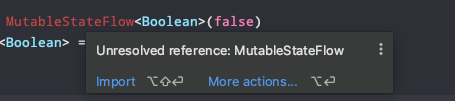
Lastly, we need to update the code that sets the “_permissionsGranted” variable inside of the “onRequestPermissionsResult” function in addition to inside of “askPermissions” function. Replace the following code:
(Inside askPermissions function)
// Request each permission
if (permissionsToAsk.size > 0) {
   ActivityCompat.requestPermissions(
       activity,
       permissionsToAsk.toTypedArray(),
       requestCode
   )
}
else {
   permissionsGranted = true
}
(Inside onRequestPermissions function)
// Make sure the request code matches
if (this.requestCode == requestCode){

   // Check if any of the permissions were not granted
   _permissionsGranted = grantResults.any { it == PackageManager.PERMISSION_DENIED }

}
with the code shown below:
(Inside askPermissions function)
// Request each permission
if (permissionsToAsk.size > 0) {
   ActivityCompat.requestPermissions(
       activity,
       permissionsToAsk.toTypedArray(),
       requestCode
   )
}
else {
   _permissionsGranted.value = true
}
(Inside onRequestPermissions function)
// Make sure the request code matches
if (this.requestCode == requestCode){

   // Check if any of the permissions were not granted
   _permissionsGranted.value = grantResults.any { it == PackageManager.PERMISSION_DENIED }
}
Notice that we are now setting the value property of _permissionsGranted.
BLEManager Class
Bluetooth Manager
Add a new folder (package) called model and then add a file inside the model folder and select Class and name the file BLEManager. The BLEManager will be responsible for managing all BLE-related activities. In this tutorial, we will add scanning functionality to the BLEManager.

Add a constant of type Context inside the BLEManager constructor. Context will be needed to access an instance of BluetoothManager. Also, go ahead and add a new constant for TAG at the top that will be used for logging.
class BLEManager(val context: Context) {

    private val TAG = "BLEManager"

}
There are several Android Bluetooth components we will be working with.
- BluetoothManager: “High-level manager used to obtain an instance of a BluetoothAdapter and to conduct overall Bluetooth Management.”
- BluetoothAdapter: “Represents the local Bluetooth adapter (Bluetooth radio). The BluetoothAdapter is the entry-point for all Bluetooth interaction. Using this, you can discover other Bluetooth devices, query a list of bonded (paired) devices, instantiate a BluetoothDevice using a known MAC address, and create a BluetoothServerSocket to listen for communications from other devices. Fundamentally, this is your starting point for all Bluetooth actions.”
- BluetoothLEScanner: “This class provides methods to perform scan-related operations for Bluetooth LE devices. An application can scan for a particular type of Bluetooth LE devices using ScanFilter. It can also request different types of callbacks for delivering the result.”
Inside the newly created BLEManager file, we need to declare a few variables. To perform BLE scanning, we will need an instance of BluetoothManager, a reference to the BluetoothAdapter owned by BluetoothManager, and a reference to the BluetoothLEScanner owned by BluetoothAdapter. Let’s declare each of these with lazy initializers. Using a Lazy initializer means that the variable will not be initialized until accessed. This is convenient for scenarios where we want to assign something to a variable that won’t be available until run-time. Instead of making the variable nullable and assigning its value during the initialization of the class, we can use lazy initialization.
private val bluetoothManager = (context.getSystemService(Context.BLUETOOTH_SERVICE) as BluetoothManager)

private val bluetoothAdapter: BluetoothAdapter by lazy {
    bluetoothManager.adapter
}

private val bluetoothLeScanner: BluetoothLeScanner by lazy {
    bluetoothAdapter.bluetoothLeScanner
}
In order to perform any Bluetooth actions, we need to ensure that Bluetooth is enabled and turned on. First, declare a constant named “REQUEST_BT_ENABLE” at the top, inside BLEManager, just below the “TAG” declaration. Assign it a value of 3. Android Studio may give you a warning for the naming format. You can ignore the warning.
private val TAG = "BLEManager"
private val REQUEST_ENABLE_BT = 3
Add an initializer to our BLEManager and add logic to check if Bluetooth is enabled and, if not, request that the user enable it.
init {
    if (!bluetoothAdapter.isEnabled){
        val enableBtIntent = Intent(BluetoothAdapter.ACTION_REQUEST_ENABLE)
        (context as Activity).startActivityForResult(
            enableBtIntent,
            REQUEST_ENABLE_BT)
    }
}
Bluetooth Adapter State
Explanation of need for observing adapter state
As mentioned above, the Bluetooth Adapter represents the Bluetooth radio. It’s important for the application to track Bluetooth adapter state changes. If the adapter is off, it won’t be possible to perform any Bluetooth-related operations. The possible Bluetooth adapter states are:
- BluetoothAdapter.STATE_OFF: “Indicates the local Bluetooth adapter is off.”
- BluetoothAdapter.STATE_TURNING_ON: “Indicates the local Bluetooth adapter is turning on. However, local clients should wait for STATE_ON before attempting to use the adapter.”
- BluetoothAdapter.STATE_ON: “Indicates the local Bluetooth adapter is on and ready for use.”
- BluetoothAdapter.STATE_TURNING_OFF: “Indicates the local Bluetooth adapter is turning off. Local clients should immediately attempt graceful disconnection of any remote links.”
Bluetooth Adapter state intent filter, Bluetooth adapter state observer
Let’s add a function inside of BLEManager and call it “setupBluetoothAdapterStateHandler” where we can set up the code to track the Bluetooth adapter state. At the top of the function, we need to declare a broadcast receiver object named “bluetoothAdapterStateReciever.” This broadcast receiver will receive Bluetooth adapter state changes. Leave the broadcast receiver object empty, and we will come back to add code later.
private fun setupBluetoothAdapterStateHandler() {

    val bluetoothAdapterStateReceiver: BroadcastReceiver = object : BroadcastReceiver() {

        override fun onReceive(context: Context, intent: Intent) {

        }
    }

}
Below the broadcast receiver and inside setupBluetoothAdapterStateHandler, declare a constant called filter and set it equal to an intent filter initialized with BluetoothAdapter.ACTION_STATE_CHANGED. Next, we need to register our broadcast receiver object to be called when any broadcast intent matches the filter we have specified, in this case, when there is a BluetoothAdapter state change.
val filter = IntentFilter(BluetoothAdapter.ACTION_STATE_CHANGED)
(context as Activity).registerReceiver(bluetoothAdapterStateReceiver, filter)
Now that we’ve registered the broadcast receiver let’s go back and add our code to receive Bluetooth adapter state changes. Inside the broadcast receiver, override the onRecieve function. Declare a const and assign the intent action to it. Next, add logic to verify the action matches BluetoothAdapter.ACTION_STATE_CHANGED.
val bluetoothAdapterStateReceiver: BroadcastReceiver = object : BroadcastReceiver() {

    override fun onReceive(context: Context, intent: Intent) {
        // Verify the action matches what we are looking for
        if (intent.action == BluetoothAdapter.ACTION_STATE_CHANGED) {

        }
    }
}
The ACTION_STATE_CHANGE intent always contains extra fields EXTRA_STATE and EXTRA_PREVIOUS_STATE, and we can obtain those values by calling getIntExtra on the intent. Declare and assign two new constants and set them equal to the EXTRA_STATE and EXTRA_PREVIOUS_STATE. Finally, add a switch to determine the current adapter state. Later on, in this tutorial, we will use previousState.
override fun onReceive(context: Context, intent: Intent) {
    // Verify the action matches what we are looking for
    if (intent.action == BluetoothAdapter.ACTION_STATE_CHANGED) {

        val previousState = intent.getIntExtra(
            BluetoothAdapter.EXTRA_PREVIOUS_STATE,
            BluetoothAdapter.ERROR
        )

        val currentState = intent.getIntExtra(
            BluetoothAdapter.EXTRA_STATE,
            BluetoothAdapter.ERROR
        )

        when (currentState) {
            BluetoothAdapter.STATE_OFF ->
                Log.d(TAG, "BluetoothAdapter State: Off")
            BluetoothAdapter.STATE_TURNING_OFF ->
                Log.d(TAG, "BluetoothAdapter State: Turning off")
            BluetoothAdapter.STATE_ON ->
                Log.d(TAG, "BluetoothAdapter State: On")
            BluetoothAdapter.STATE_TURNING_ON ->
                Log.d(TAG, "BluetoothAdapter State: Turning on")
        }
    }
}
Inside of the BLEManager initializer, add a call to the “setupBluetoothAdapterStateHandler” function prior to the code that checks if the Bluetooth adapter is enabled.
init {

    setupBluetoothAdapterStateHandler()

    if (!bluetoothAdapter.isEnabled){
        val enableBtIntent = Intent(BluetoothAdapter.ACTION_REQUEST_ENABLE)
        (context as Activity).startActivityForResult(
            enableBtIntent,
            REQUEST_ENABLE_BT)
    }
}
We need to add an instance of BLEManager to our app. For now, let's add an instance inside of the onCreate function inside the MainActivity.
override fun onCreate(savedInstanceState: Bundle?) {
   super.onCreate(savedInstanceState)
   setContentView(R.layout.activity_main)
   PermissionManager.askPermissions(this)
   val bleManager = BLEManager(this)
}
Import BLEManager at the top of the MainActivity file.
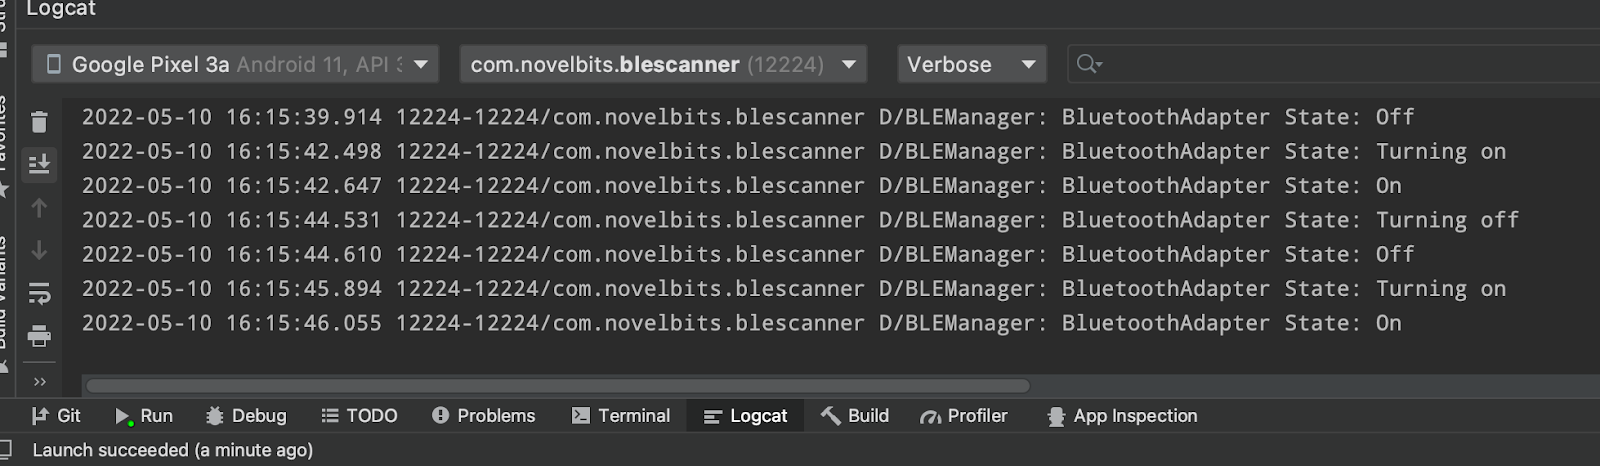
import com.novelbits.blescannertest.model.BLEManagerRun the app and confirm you see the adapter state logs in the console when you toggle the Bluetooth on and off.
Scan Configuration
Android provides many settings to tailor Bluetooth scanning to fit your application needs.
- Callback Type: configure whether a callback is triggered for every advertisement from a single device and whether to trigger a callback when advertisements are no longer received from a previously discovered device.
- CALLBACK_TYPE_ALL_MATCHES: “Trigger a callback for every Bluetooth advertisement found that matches the filter criteria. If no filter is active, all advertisement packets are reported.”
- CALLBACK_TYPE_FIRST_MATCH: “A result callback is only triggered for the first advertisement packet received that matches the filter criteria.”
- CALLBACK_TYPE_MATCH_LOST: “Receive a callback when advertisements are no longer received from a device that has been previously reported by a first match callback.”
Configuring the callback type to include all matches would be important for monitoring dynamic advertisement data or signal strength, for example.
- Legacy: restrict scan results to only include legacy-type advertisements.
Bluetooth Version 5.0 introduced a new feature called Extended Advertisements that enables devices to advertise more data than was allowed with Legacy Advertisements. When building an application that will only interact with devices utilizing Legacy Advertisements, it’s possible to restrict scanning to only return Legacy Advertisements.
- Match Mode: configure how quickly ScanFilter matches should be reported
- MATCH_MODE_AGGRESSIVE: “In Aggressive mode, hw will determine a match sooner even with feeble signal strength and few number of sightings/match in a duration.”
- MATCH_MODE_STICKY: “For sticky mode, a higher threshold of signal strength and sightings is required before reporting by hw”
Setting the match mode to sticky would be useful to reduce the number of matches reported that may be out of stable connection range.
- Number of Matches: configure the number of advertisements to report for devices matching a specific ScanFilter
- MATCH_NUM_FEW_ADVERTISEMENT: “Match few advertisements per filter, depends on current capability and availability of the resources in hw”
- MATCH_NUM_MAX_ADVERTISEMENT: “Match as many advertisements per filter as hw could allow, depends on current capability and availability of the resources in hw”
- MATCH_NUM_ONE_ADVERTISEMENT: “Match one advertisement per filter”
Limiting the number of advertisements reported for each ScanFilter match may help reduce CPU usage. If the advertisement data is not dynamic, there may be no benefit in receiving multiple advertisements for each device.
- Physical Layer: “Set the Physical Layer to use during this scan.”
- PHY_LE_ALL_SUPPORTED: “Use all supported PHYs for scanning. This will check the controller capabilities and start the scan on 1Mbit and LE Coded PHYs if supported, or on the 1Mbit PHY only.”
- PHY_LE_1M: “Use only 1M PHY for scanning.”
- PHY_LE_CODED: “Use only LE Coded PHY for scanning.”
In the case of Extended Advertisements supported with Bluetooth 5.0, we can restrict scanning to the 1M PHY or allow advertisements to be scanned on both the 1M and LE Coded PHYs.
- Report Delay: “Set report delay timestamp for Bluetooth LE scan. If set to 0, you will be notified of scan results immediately. If > 0, scan results are queued up and delivered after the requested delay or 5000 milliseconds (whichever is higher). Note scan results may be delivered sooner if the internal buffers fill up.”
It may be beneficial in some applications to process bulk scan results at regular intervals rather than asynchronously as they are received.
- Scan Mode: configure the scan prioritization
- SCAN_MODE_BALANCED: “Perform Bluetooth LE scan in balanced power mode. Scan results are returned at a rate that provides a good trade-off between scan frequency and power consumption.”
- SCAN_MODE_LOW_LATENCY: “Scan using highest duty cycle. It’s recommended to only use this mode when the application is running in the foreground.”
- SCAN_MODE_LOW_POWER: “Perform Bluetooth LE scan in low power mode. This is the default scan mode as it consumes the least power. This mode is enforced if the scanning application is not in the foreground.”
- SCAN_MODE_OPPORTUNISTIC: “A special Bluetooth LE scan mode. Applications using this scan mode will passively listen for other scan results without starting BLE scans themselves.”
NOTE: Opportunistic scan mode allows an application to intercept scan results from scans that were started by other applications or by the Android OS.
Scan mode provides an opportunity to optimize for battery consumption or reduced latency.
Define a ScanSettings constant at the top of BLEManager using a lazy initializer. The Android SDK provides a ScanSettings builder that makes configuring ScanSettings easy. Inside the lazy initializer for scanSettings, add a call to the ScanSettings builder. Configure each available setting as shown, or feel free to test out different options. This is typically not necessary as many of the defaults will suffice, but all are included here for reference.
private val scanSettings: ScanSettings by lazy {
    ScanSettings.Builder()
        .setCallbackType(CALLBACK_TYPE_ALL_MATCHES)
        .setLegacy(false)
        .setMatchMode(MATCH_MODE_AGGRESSIVE)
        .setNumOfMatches(MATCH_NUM_MAX_ADVERTISEMENT)
        .setPhy(PHY_LE_ALL_SUPPORTED)
        .setReportDelay(0)
        .setScanMode(SCAN_MODE_LOW_LATENCY)
        .build()
}
Scanning
Android Scanning Limitations
Android includes a few restrictions related to BLE scanning that are important but not well known.
- Android rate limits the number of start scan calls to 5 within a time interval of 30 seconds. If that value is exceeded, there will be a one-minute timeout before being able to start scanning again.
- Scans timeout out after 30 minutes, so need to be restarted if the goal is to scan continuously.
Starting a Scan
Android provides two different options for receiving scan results during a Bluetooth scan.
Option 1: Scan results received by Callback
In order to receive scan results via Callback, we first need to define a ScanCallback object. Inside BLEManager, below the “setupBluetoothAdapterStateHandler,” define a new constant called leScanCallback of type ScanCallback using a lazy initializer.
private val leScanCallback: ScanCallback by lazy {
    object: ScanCallback() {

    }
}
Now, inside the ScanCallback we need to override two methods, onScanResult and onScanFailed. Add console logs in both overridden functions to verify things are working when we run the app later.
private val leScanCallback: ScanCallback by lazy {
    object: ScanCallback() {

        override fun onScanResult(callbackType: Int, result: ScanResult?) {
            super.onScanResult(callbackType, result)
            Log.d(TAG, "BLE Scan Result")
        }

        override fun onScanFailed(errorCode: Int) {
            super.onScanFailed(errorCode)
            Log.d(TAG, "BLE Scan Failed with ErrorCode: $errorCode")
        }
    }
}
Next, add a function below leScanCallback called startScanning. Now add a call to start a scan and pass in the scanSettings, scanFilters, and the leScanCallback we just defined. We also need to make sure that the correct permissions have been granted before starting a scan. Make sure to add a check as shown. Android will include a warning for the start scan call indicating the check needs to be performed.
fun startScanning(){
   if (PermissionManager.permissionsGranted.value) {
       bluetoothLeScanner
           .startScan(
               scanFilters,
               scanSettings,
               this.leScanCallback)
   }
}
We need to add a call to start scanning. Normally, we would set this up differently but since this is only for demonstration, we are going to invoke a call to start scanning from the main activity.
We need to wait for permissions to be granted before we attempt a scan. In the Coroutines section, we set up the PermissionsManager to make this possible. We need to declare and define a CoroutineScope where we will observe the permssionsGranted StateFlow on PermissionManager. Inside of the MainActivity towards the top, declare a new constant called scope.
val scope = CoroutineScope(Dispatchers.IO)On the line below bleManager inside of the onCreate function in the MainActivity, launch a new Coroutine using the scope we just defined and observe the permissionsGranted StateFlow property of PermissionManager. If permissions have been granted, start scanning.
override fun onCreate(savedInstanceState: Bundle?) {
super.onCreate(savedInstanceState)
setContentView(R.layout.activity_main)
PermissionManager.askPermissions(this)
val bleManager = BLEManager(this)
scope.launch {
PermissionManager.permissionsGranted.collect{ permissionsGranted ->
if (permissionsGranted) {
bleManager.startScanning()
}
}
}
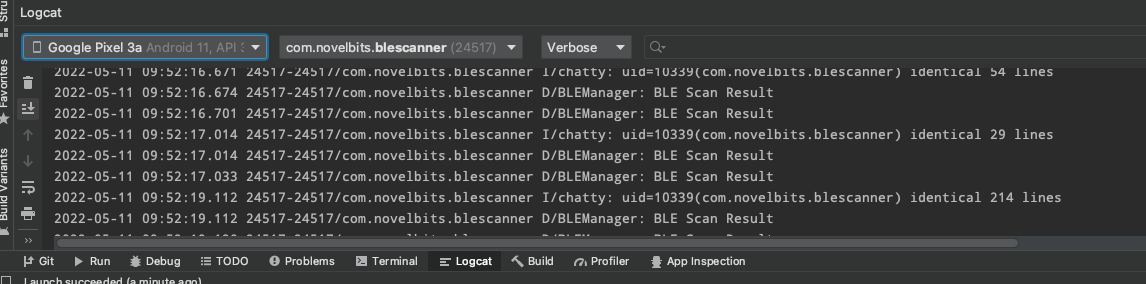
}Run the application and confirm scan results are being received by the callback.
Option 2: Scan results delivered via a PendingIntent
Option 2 requires significantly more work to set up than option one. First, we set up an Intent, an IntentFilter, and a PendingIntent. At the top of the BLEManager, below the bluetoothLeScanner declaration, add each as shown below.
val ACTION = "BluetoothDevice.ACTION_FOUND"
val FLAGS = PendingIntent.FLAG_UPDATE_CURRENT

val intent = Intent(context, LEScanBroadcastReceiver::class.java).setAction(ACTION)
val intentFilter = IntentFilter(BluetoothDevice.ACTION_FOUND)
val pendingIntent = PendingIntent.getBroadcast(this.context, -1, intent,FLAGS)
Next, we need to set up a broadcast receiver. Add a new class declaration above BLEManager named LEScanResultBroadcastReciever that extends BroadcastReciever. Add a TAG at the top for logging and override the onRecieve method. Inside of the onRecieve function, add logic to verify the intent action matches BluetoothDevice.ACTION_FOUND. Finally, we need to grab the scan result from the intent.
class LEScanBroadcastReceiver: BroadcastReceiver() {

    private val TAG = "LEScanBroadcastReciever"

    override fun onReceive(context: Context?, intent: Intent?) {
        val action = intent?.action
        val EXTRA = BluetoothLeScanner.EXTRA_LIST_SCAN_RESULT
        if (action == "BluetoothDevice.ACTION_FOUND"){
            val scanResult = intent.getParcelableArrayListExtra<ScanResult>(EXTRA)
            Log.d(TAG, "Scan Result: ${scanResult}")
        }
    }
}
Now we need to initialize an instance of LEBroadcastReciever inside BLEManager and register it with the intentFilter. Add a call to registerReciever inside the init function and pass the LEBroadcastReciever instance and the intentFilter.
private val leScanBroadcastReceiver: LEScanBroadcastReceiver = LEScanBroadcastReceiver()

init {
    setupBluetoothAdapterStateHandler()
    (context as Activity).registerReceiver(leScanBroadcastReceiver, intentFilter)

    if (!bluetoothAdapter.isEnabled){
        val enableBtInt = Intent(BluetoothAdapter.ACTION_REQUEST_ENABLE)
        (context as Activity).startActivityForResult(enableBtInt, REQUEST_ENABLE_BT)
    }
}
Finally, we need to register the receiver and intent filter in the Android Manifest inside of the application tag as shown below.
<application
    android:allowBackup="true"
    android:icon="@mipmap/ic_launcher"
    android:label="@string/app_name"
    android:roundIcon="@mipmap/ic_launcher_round"
    android:supportsRtl="true"
    android:theme="@style/Theme.BLEScanner">
    <activity
        android:name=".MainActivity"
        android:exported="true">
        <intent-filter>
            <action android:name="android.intent.action.MAIN" />
            <category android:name="android.intent.category.LAUNCHER" />
        </intent-filter>
    </activity>
    <receiver
        android:name="com.novelbits.blescanner.model.LEScanBroadcastReceiver"
        android:exported="true">
        <intent-filter>
            <action android:name="BluetoothDevice.ACTION_FOUND"/>
        </intent-filter>
    </receiver>
</application>
Update the startScan call in BLEManager to pass the pending intent instead of the leScanResultCallback.
fun startScanning(){
    bluetoothLeScanner
        .startScan(
            scanFilters,
            scanSettings,
            this.pendingIntent)
}
Run the app and make sure you see the expected output in the console.
Scan Options Summary
Option 1: Callback-Based Scan
Pros:
- Simple setup
- Scan results are returned as ScanResult objects; no need to interact with intents to unwrap data
- Supported on older versions of Android
Cons:
- Background scan is limited to 10 minutes without adding a Foreground Service to keep the app running in the background
- Not possible to re-launch the application from the scan result event
Option 2: PendingIntent Based Scan
Pros:
- Scan results delivered in the background without the need to add a Foreground Service
- Ability to re-launch the application on scan result event
Cons:
- A complicated setup, requires a much larger effort
- Higher power consumption
- Only supported Android 8 and later
Logging and Interacting with Scan Results
Let’s go back to the onScanResult function defined in BLEManager inside of the leScanCallback and update the console log to include all the data included in each of the scan results. Android provides the manufacturer data as a SparseArray, so we will add a function to convert it to a hex byte array. Add the function shown inside BLEManager.
private fun toString(array: SparseArray<ByteArray?>?): String? {
   if (array == null) {
       return "null"
   }
   if (array.size() == 0) {
       return ""
   }
   val buffer = StringBuilder()

   for (i in 0 until array.size()) {
       buffer.append( String.format("%02x", array.keyAt(i)))
       val a = array.valueAt(i)
       a?.let {
           it.forEach { byte ->
               buffer.append(String.format("%02x", byte))
           }
       }
   }

   return buffer.toString()
}
We also need to format the raw advertisement data into a hex string as shown so that it’s readable.
private val leScanCallback: ScanCallback by lazy {
object : ScanCallback() {
override fun onScanResult(callbackType: Int, result: ScanResult?) {
super.onScanResult(callbackType, result)
val record = result?.scanRecord
Log.d(TAG, """
BLE ScanResult
Periodic Advertising Interval: ${result?.periodicAdvertisingInterval}
Primary Phy: ${result?.primaryPhy}
RSSI: ${result?.rssi}
Secondary PHY: ${result?.secondaryPhy}
Timestamp: ${result?.timestampNanos}
TX Power: ${
if (result?.txPower == TX_POWER_NOT_PRESENT) "NOT PRESENT"
else result?.txPower}
Connectable: ${result?.isConnectable}
Legacy: ${result?.isLegacy}
""".trimIndent())
var rawAdvBytes: String = ""
record?.bytes?.let { bytes ->
for (b in bytes){
rawAdvBytes += String.format("%02x", b)
}
}
var manufactureDataBytes: String = ""
toString(record?.manufacturerSpecificData)?.let {
manufactureDataBytes = it
}
Log.d(TAG, """
BLE ScanRecord
Advertisement Raw Bytes: $rawAdvBytes
Advertisement Flags: ${record?.advertiseFlags}
Device Name: ${record?.deviceName}
Manufacturer Specific Data: $manufactureDataBytes
Service Data: ${record?.serviceData}
Service Solicitation UUIDs: ${record?.serviceSolicitationUuids}
Service UUIDs: ${record?.serviceUuids}
""".trimIndent())
}
override fun onScanFailed(errorCode: Int) {
super.onScanFailed(errorCode)
Log.d(TAG, "BLE Scan Failed with ErrorCode: $errorCode")
}
}
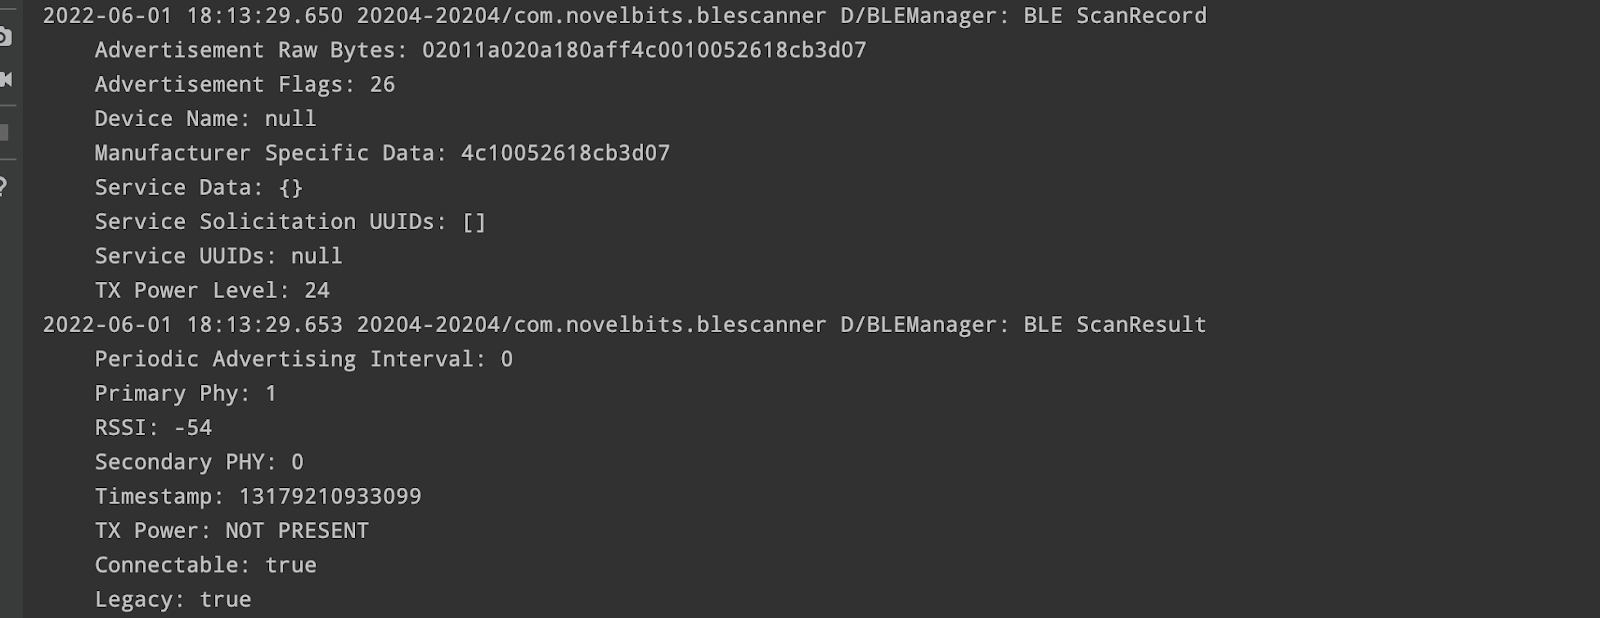
}Verify you see the expected console output:
Summary & Next Steps
In this tutorial, we covered everything required to get an Android application set up with the correct permissions and begin scanning for Bluetooth Low Energy devices.
Getting Started with Android Bluetooth LE Development - Part 2 covers:
- The steps needed to properly manage connections and disconnections with Bluetooth Low Energy devices from an Android application
- nRF52 Development Kit Setup: Nordic_Blinky example
- Updating ScanFilters to filter for Nordic_Blinky example
- Building a Class to represent the development kit running the Nordic_Blinky example
- Building reliable logic to track discovered and connected devices
- Building a ListView with Jetpack Compose to display discovered and connected devices
- The most common connection error in Android and how to avoid it
Getting Started with Android Bluetooth LE Development - Part 3 covers:
- Modifying the NordicBlinky example to require pairing and bonding
- Importance of tracking and observing bond state for devices that require bonding
- Initiating GATT discovery and building a model to encapsulate characteristic references
- Requesting a larger MTU
- GATT Operations
- Using Flows to make characteristic data updates observable
- Abstracting GATT operations
- Importance of synchronous GATT operations
- Building a GATT queue to ensure GATT operations happen synchronously
- Updating the app to support multiple views with a Navigation controller
- Building a new view to display NordicBlinky states and control the LED


