1.1 Welcome & Course Overview
Introduction
Welcome to Bluetooth LE Unplugged!
In this course, you're going to learn Bluetooth Low Energy (Bluetooth LE) by doing, not just reading. Instead of wading through hundreds of pages of specification documents, you'll explore the protocol stack hands-on using two real Bluetooth LE USB dongles and simple text commands.
By the end, you'll understand how Bluetooth LE devices discover each other, connect, exchange data, and secure their communications. And you'll have done all of it yourself, on your own hardware.
What Makes This Course Different
Most Bluetooth LE learning resources fall into one of two camps: either they're abstract specification walkthroughs with no practical exercises, or they're vendor-specific SDK tutorials that bury the fundamentals under layers of toolchain setup.
This course takes a different path. You'll use BleuIO USB dongles, small Bluetooth LE devices that you control entirely through AT commands (simple text commands you type into a terminal). There's no SDK to install, no embedded C to compile, and no IDE to configure. You plug in a dongle, open a terminal, and start exploring Bluetooth LE immediately.
I recommend this approach for anyone learning Bluetooth LE for the first time. In my experience teaching Bluetooth LE over the past decade, direct hardware interaction builds understanding faster than any textbook or video lecture alone. When you type a command and see a real device respond, the concepts stick in a way that reading alone can't achieve.
Your Hardware: Two Dongles, Two Roles
Let's take a look at the hardware you'll be working with. Your course kit includes two BleuIO Standard dongles (one white and one black):
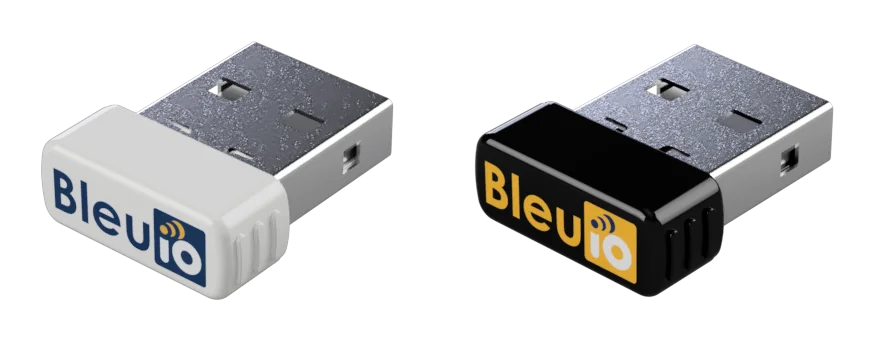
Each dongle has a fixed role based on its color:
- White dongle = Central (scanner/initiator): scans for nearby Bluetooth LE devices and initiates connections. Think of it as the "phone" in a phone-to-sensor scenario.
- Black dongle = Peripheral (advertiser/responder): advertises its presence and accepts incoming connections. Think of it as the "sensor" or "wearable."
Having both roles on your desk means you can simulate complete Bluetooth LE interactions (advertising, scanning, connecting, and data exchange) without needing any other devices. You are both sides of the conversation.
Key Takeaway: Two dongles give you full control over both ends of every Bluetooth LE interaction. You'll never need to rely on a phone app or external device to complete an exercise.
What You'll Learn
Let's walk through the course structure. It's organized into 15 modules across 3 tiers that progressively build your Bluetooth LE knowledge:
Foundations (Modules 1-7), Starter Tier
These modules cover the core Bluetooth LE stack using AT commands:
- Setting up your dongles and running your first commands
- Understanding the Bluetooth LE architecture (how the protocol layers fit together)
- Advertising and scanning (how devices discover each other)
- Connections and parameters (how devices establish and maintain links)
- GATT services and characteristics (the data model that Bluetooth LE uses)
- Reading and writing data (actually exchanging information between devices)
- Troubleshooting common issues (diagnosing connection failures and data transfer problems)
Security, Performance & Automation (Modules 8-12), Professional Tier
These modules add security, optimization, Python scripting, and hands-on challenges:
- Security, pairing, and bonding (how devices establish trust)
- Performance optimization (MTU negotiation, throughput tuning)
- Multi-device scenarios (multiple connections, dual role)
- Python automation with the bleuio-py library
- Capture-the-flag challenges (hands-on exercises)
Expert Topics (Modules 13-15), Expert Tier
These modules tackle packet-level analysis and real-world debugging:
- Packet analysis with a Bluetooth LE sniffer and Wireshark
- Deep-dive packet capture (filtering, protocol interpretation)
- Advanced debugging and protocol analysis
Each module builds on the previous one, so the concepts layer naturally as you progress.
Prerequisites
Let's go over what you need before we dive in. This course assumes:
- No prior Bluetooth experience: we start from zero
- Basic comfort with a terminal/command line: you should know how to open a terminal and type commands
- Python 3.6+ installed (for Professional and Expert tier modules only)
That's it. If you can open a terminal window, you're ready.
How Each Lesson Works
Every lesson has a written guide (the text you're reading now), and most hands-on lessons also include a companion video walkthrough. The written guide is always the complete source; videos are supplementary demonstrations for exercises where seeing the timing, scrolling output, and live interaction on hardware is more effective than reading about it.
Some lessons are purely conceptual (like this welcome, tables and overviews, and reference summaries) and stay text-only. For those, prose and diagrams communicate more clearly than narration.
Videos are being rolled out in phases, with the highest-impact hands-on lessons available first. When a lesson has a video, you'll see it embedded within the lesson content. Whether a given lesson has a video or not, the written guide always covers the full material.
Within each hands-on lesson, you'll follow a consistent pattern:
- Concept: a brief explanation of what you're about to explore
- Try It: a hands-on exercise with commands and expected output
- Key Takeaway: one or two sentences connecting the exercise back to the bigger picture
This "concept → try it → takeaway" loop repeats throughout the course. Some lessons are conceptual (like the architecture overview in Module 2) and focus on building mental models rather than running commands, but even those connect back to the AT commands you'll use later. You'll always know what you're doing and why.
Reading the Course Material
Throughout the course, you'll see a few visual conventions that help you follow along:
Terminal blocks show AT command sessions. The highlighted lines are commands you type; everything else is the dongle's response:
ATI

Smart Sensor Devices
DA14683 (W25Q80EW)
BleuIO
Firmware Version: 2.7.9.78
Each terminal block has a small copy icon in its header. Clicking it copies just the command lines (the highlighted ones — not the dongle's responses) in one shot, which saves time when a lesson's setup has many commands in a row.
If a block uses placeholders like <PERIPHERAL-ADDRESS> (explained just below), a short popover will open the first time you click copy, asking you for your dongle's real address. Once you save, the LMS remembers it for the rest of your browser session and substitutes automatically on every later block that uses the same placeholder — enter each value once and the rest just works. A small pencil icon appears next to the copy button whenever a stored value exists, so you can update or clear it later (useful if you swap dongles mid-course, or when you hit the Module 12 CTF challenges where a different "challenge server" dongle acts as the peripheral). Stored values live only in the browser session and clear when you close the tab.
Dongle labels tell you which terminal to type in. Commands are always labeled with the dongle color and role:
- Central (white): commands for the central (white) dongle's terminal
- Peripheral (black): commands for the peripheral (black) dongle's terminal
All command output in the lessons is shown inline as terminal blocks (text you can copy and compare against your own), not as screenshots.
Placeholders inside commands use angle brackets, like <PERIPHERAL-ADDRESS> or <CENTRAL-ADDRESS>. These represent values that differ between dongles (the MAC address you retrieved with AT+GETMAC, for example). When you see a placeholder in a command block, substitute your own dongle's value before typing the command. The lessons use placeholders rather than hard-coded addresses so the output stays correct regardless of which pair of dongles you have.
For example, a connection command in a later lesson appears in the lesson text like this:
AT+GAPCONNECT=[0]<PERIPHERAL-ADDRESS>
When you click the copy icon, the LMS substitutes the value you saved earlier (say, C4:64:E3:F1:8B:42) and what actually pastes into your terminal is the real command:
AT+GAPCONNECT=[0]C4:64:E3:F1:8B:42
Callout boxes highlight important information:
Key Takeaway: These summarize the main concept from an exercise.
Tip: These offer practical advice or shortcuts.
Summary
In this lesson, we covered:
- What this course teaches and how it's structured (15 modules across 3 tiers)
- Why the two-dongle approach gives you complete control over Bluetooth LE interactions
- What you need to get started (a terminal and your two BleuIO dongles)
- How each lesson works (concept → try it → takeaway)
What's Next
In the next lesson, we'll get your BleuIO dongles plugged in and verify that they're working. By the end of that lesson, you'll have both dongles responding to commands and ready for the rest of the course.